[widget id=”text-10″]
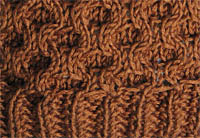
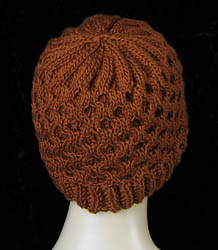
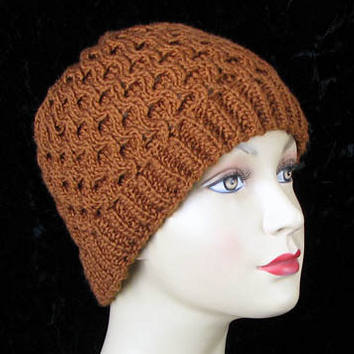
This honeycomb is a simple cable pattern that is great for beginning cable knitters. You can vary this pattern with different rib stitches — just make sure the gauge is the same as or tighter than the cable pattern. For another variation, add additional knit rows to the honeycomb pattern to increase the size of cable cell.
Note: Links to products on this page are affiliate links.
Materials
Yarn: 3 ounces (85 grams) 185 yards, worsted weight. The example was done with Naturally Caron Country Yarn (Color: Vicuna).
Shop for worsted weight yarn for this pattern at Etsy
Circular Needles, Size 7 US (4.5 mm), 16″ long (for ribbing)
Circular Needles, Size 9 US (5.5 mm), 16″ long (for hat body).
I highly recommend Addi Turbo Knitting Needles because their slick surface and flexible loop make for almost effortless knitting. More info on Addi Turbo Needles
Double pointed needles, size 9 US, 5.5 mm.
Cable needle or double pointed needle to hold cable stitches. I prefer using a double pointed wood or plastic needle for my cable stitches.
[widget id=”black-studio-tinymce-11″]
Stitch Information
Gauge in honeycomb pattern using size 9 needles: 20 st = 3 in (7.5 cm)
Finished measurements: Hat body about 20″ (25cm) in circumference. 8″ (20cm) from cast-on edge to crown.
Increase or decrease in multiples of 8. You will need to adjust the decrease for your total number of stitches.
Abbreviations:
- C4F – Cable four front. Slip two stitches from left needle onto cable needle or dp needle. Move cable needle to front of work. Knit next two stitches from left needle. Then knit the two stitches off the cable needle.
- C4B – Cable four back. Slip two stitches from left needle onto cable needle or dp needle. Move cable needle to back of work. Knit next two stitches from left needle. Then knit the two stitches off the cable needle.
- K2tog – Knit two stitches together.
See the video below for a demo of the cable stitches.
Seed Stitch Rib:
 Cast on 137 stitches with size 7 circular needles. I recommend putting stitch markers every 24 stitches to help keep track of the pattern.
Round 1: *k3, p1, rep from * to end. (First round of hat only: Slip first stitch. Follow pattern to last stitch. Purl last stitch with slipped first stitch, being careful not to twist the row. This will close the round and decrease one stitch. 136 st. Place marker.)
Round 2: p1, *k1, p3, rep from * to last 3 stitches, k1 p2.
Repeat Rounds 1-2 until you have 14 rounds.
Variation: You can substitute other rib stitches but I found the cable pattern is tighter than many rib patterns (including 1×1) so if the gauge of the rib isn’t as tight or tighter than the cable, knit the rib with smaller needles or reduce the number of stitches in the rib and put in an increase row. Do a swatch!
Body:
 Switch to size 9 circular needles.
Round 1: *C4F, C4B, rep from * to end.
Rounds 2, 3, 4: Knit.
Round 5: *C4B, C4F, rep from * to end.
Rounds 6, 7, 8: Knit.
Repeat rounds 1-8 until hat measures about 6″ from cast on row. End on row 5.
Decrease:
Tip: I place stitch markers at every decrease so I don’t lose track of where a decrease is needed.
Switch to double pointed needles (or continue with the circular needle as far as you comfortably can — for me until about round 6 — and then switch).
 Round 1: *K6, K2tog. (119 st)
Round 2: Knit.
Round 3: *K5, K2tog. (102 st)
Round 4: Knit.
Round 5: *K4, K2tog. (85 st)
Round 6: Knit.
Round 7: *K3, K2tog. (68 st)
Round 8: Knit.
Round 9: *K2, K2tog. (51 st)
Round 10: Knit.
Round 11: *K1, K2tog. (34 st)
Round 12: Knit.
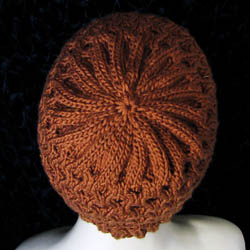
Round 13: *K2tog. (17 st)
Finishing:
Cut the yarn leaving about 6″ tail. Using a tapestry needle, thread the tail through the remaining stitches. Pull stitches together tightly. Thread tail through hole in crown. Draw crown closed securely by pulling tail. Weave the tail and all other ends through stitches on wrong side.
See this project on Ravelry at http://www.ravelry.com/patterns/library/honeycomb-hat-3

